Tuesday, December 25, 2012

Day 103


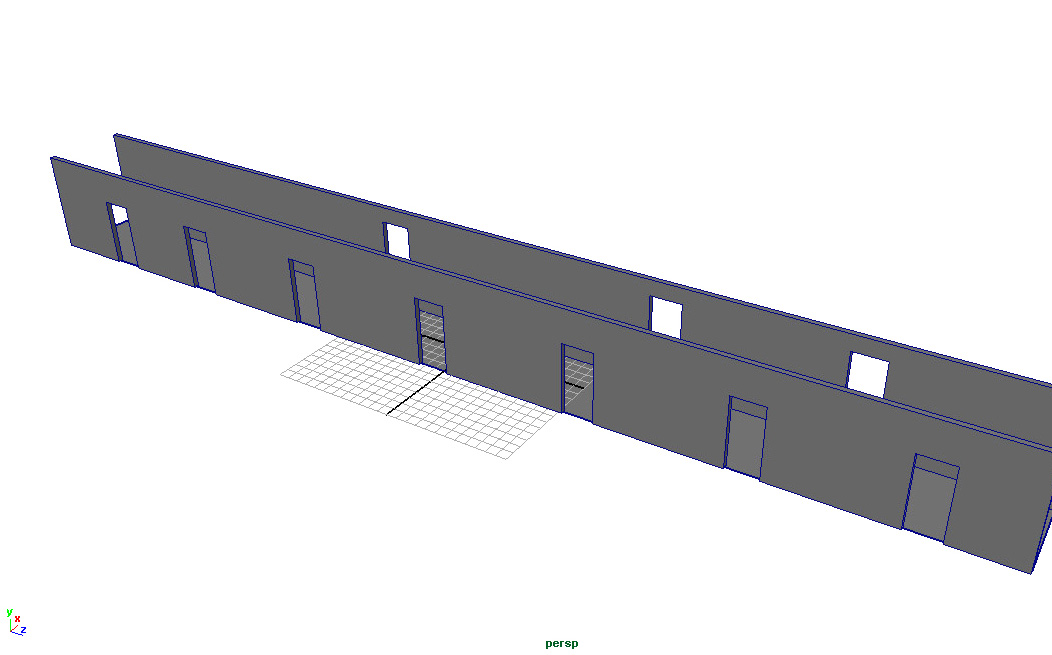
I spent a fair amount time going over the basics again. Luckily, I still managed to learn some new things. The first project involves creating a level for a possible video game. The author is very keen on being very practical so since it's for a video game, he wants to keep the polygon count low and he'll ignore any parts that the player wouldn't see. I started with the hallway and then built two rooms. At that point, the author told me to build the rest of the rooms as practice. I'm not a big fan of that approach. I don't need to have my hand held the whole time but at least give me something to aim for instead of just doing whatever I want. Anyway, I'll be coming back to this building multiple times I imagine. I think I'll just be focusing on a single room though.  


Day 102


I finished my second book and I'm on my way to the third. I thought I'd show the books I've spend so much time with. My first one is on the left. It was about 600 pages and took me over two months to get through. Meanwhile the second book on the right is about 270 pages and took me less than two weeks.


One reason I went through it so quickly, besides just being simpler and less comprehensive, is that it wasn't very information dense. You can see there's a lot of words on the left for the first book and pictures weren't afraid to get pushed into the margins. Meanwhile the other other book had a lot of empty space. I don't regret going through the second book but I'm a little disappointed that both books cost the same when the second book has probably a fifth of the information as the first.


Anyway, I'm getting into my third book now. Similar to the second book where I had one project from start to finish, this one looks like it'll be focusing on just two projects. One being the alien on the cover which looks a whole lot better than the guy from the second book. This third book is over 400 pages and isn't quite as information heavy as the first. It has a more textbook feel to it and the author is a teacher at an art school. It's also fully colored which is nice. The second book was as well but it was barely noticeable. I'm looking forward to going through this book. The first book was good but going through it felt slow and a lot of work. I think I'm over the initial hump though. We'll see.


Day 101


So I finished up Harvey here. Doing the hair on the back of his head was a pain in the ass. The cowlick was also hard to do cuz there was also some angle where it looked really weird. I also could have tweaked the nose so it looks less flat in the profile view. Otherwise, I think it turned out pretty well for my first solo try at this kind of thing.


While the end product is good, the method I used to get there wasn't very efficient or elegant. I just kind of went for the brute force method. I built him using simple polygons, however while I'm working, I can see how the smoothed final look will be. So I was just looking at the smoothed version as I was actually manipulation the blocky version beneath the surface. I wanted to keep the blocky version simple with less polygons but that meant I had to overcompensate when moving points around. This lead to overlap that I didn't want but it was still workable. I wouldn't do this in the future though. So here's how he looked before being smoothed out.


Day 100


Finally I went about animating the guy to do a little jig. Nothing too complex. Maybe I should have gave him eyes at some point.


Then I set up my camera and three lights. And the final result is below. The video is short cuz it's suppose to loop. With that, I'm done with my book. I guess that's why the guy's dancing.


Monday, December 17, 2012

Day 96


Back to this side project. I started working on the head and quickly realized that I would have to do the hair separately. I only did one half of the face and then flipped it over. In Shiu Pei's original drawing, the face isn't perfectly symmetrical but each side works together to look normal. Unfortunately when I just modeled one side and flipped it over, he looked a little weird. So I just had to do some tweaks to make him look less creepy.


Here he is with some ears, eyes and eyebrows. In some previous lesson I had, I worked with a face and saw how they did eyes. So I copied that technique to do the iris and pupils. The head is pretty symmetrical except for tweaking his smile to make him smirk.


Then I proceeded to making the hair. It was a little rough starting out but once I laid down a couple of chunks of hair, things started to get easier. He actually looks pretty good from the front but I'll save that view for when he's all done. Right now, he's bald on the back of his head.

Day 95


I'm getting ready to animate this guy so I have to rig everything up. I made a skeleton consisting of lots of joints and then I attached the skin to the skeleton.


Next is the part I hate the most. Basically I have to check how each joint affects the skin around it. Here I've selected the elbow joint and the intensity of white shows how much influence that joint has on the skin. If something looks obviously off, I can change it here but the best way to check is to rotate each joint and see if any weird deformations show up and then fix it. Fairly time intensive for a noob like me.


Lastly, here's the skeleton with some extra controls. I've set up inverse kinetics on the legs so I can just move the feet and the legs will react appropriately. The circles around the feet just make it easier to select them. I have another circle to select the hips. Then there's the big circle on the bottom which lets me move the entire guy around.

Friday, December 14, 2012

Day 94


While I have been flying through my book and it is somewhat basic, it did do something that my other book did not which is going through creating a character. My first book just gave me the person to work with. This is important because while I was working on the first book, I tried to model one of my toy action figures. That turned out to be a train wreck because I just didn't know the proper way to start. Now that I've gone over some of my second book, I felt more confident in trying to model a character. So I used (stole) a character that Shiu Pei drew which conveniently already had multiple views to use as references. I've been working on him while also doing book stuff so what you see here is what I've done over two or three days.


You can't always match a 3-D object to 2-D drawings so I had to take some liberties here and there. As I was working on the back, I noticed that Shiu Pei's drawing wasn't anatomically correct. The hands are turned the wrong way. I didn't fix it cuz the way it's drawn is easier to emulate. She also has the top thumb wrapped around the handle which I didn't do for the sake of time. The hands aren't the greatest but they work. Overall, I think it looks pretty good so far. Note that I'm not aiming for perfection. I'm doing it as fast as I can just to get it under my belt.

Day 93


With the guy more or less complete, I moved onto animating him. First was a lesson in facial movement. I did this very briefly before in an online lesson. Basically, I take my original guy and duplicate him a lot of times. Then on each one, I move just one part of the face. Here I just focused on the mouth so I moved each lip up and down, corners of the mouth up and down, etc.


Now I can link back all these faces to the original and I get a series of sliders to move different parts of the mouth. With that I can create different mouth movements. If I had made more duplicates where I moved the eyes and eyebrows and other parts of the face, you can see how I could use these sliders to make a wide range of facial expressions.


Day 90


Next I moved onto working on the head and face. Once that was done, I reflected over the other side and here's what everything looks like smoothed out.


Now I needed to color the guy. Awhile back, I learned about unfolding 3-D shapes so they're flat and you can texture them. It can get complex but this book went with a simpler approach which meant there was less room for adding details which was fine by me. Here's what I ended up coloring in Photoshop and how it looks on the guy below.


Day 89


I've started my new book. It has half the pages compared to my first book and there's much less information per page, yet it costs just the same. While it took me two months to go through the first book, after one week I'm almost done with the second. Anyway, it's another beginners book. While the first one had a variety of projects covering different topics, this book for the most part has just one project that will span the breadth of Maya. It's all focused on the pudgy guy above.


First up is the making the guy. I started with with a rough shape and refined it from there. I'm only doing one half of him so once I'm done, I can just reflect over the other side. Below I have the general shape that I want.


Sunday, December 9, 2012

Day 88


The online lessons covered painting in Maya as well. Here's a taste of the variety of 2-D brushed available. Below is another example of 3-D painting and how things can animate themselves.


Next they went over something my book didn't which is directly painting on three dimensional objects. So I colored the dino they gave me. They also showed how to paint three dimensional texture onto it as well which is where the scales come from.


This is where I'll stop with Maya's online lessons. They have more but they deal with more advanced stuff like fur, hair and water. They're still very doable since they're introductory but I figure I won't use that knowledge anytime soon. Maybe I'll go back if I get bored with my new book. 

Day 87


I'm in the last chapter of my book so it's going over some random things. They showed me how to create a cartoon effect. I did something similar earlier but that was more of a final filter applied to the whole image. This method applies the cartoon look to the individual parts.


Next is the painting effects Maya has. You can paint two dimensionally like in any other art program but you can also paint three dimensional things. So here when I lay down a brush stroke, grass or flowers pop up. Also, you can easily animate them to sway in the wind which is a little hard to see in this video.


Maya has all kinds of weird brushes like buildings and lighting bolts.


And with that, I am officially done with my book. I am now a Maya beginner. Looking back, I would have liked to have gone through it faster. I tried to limit myself because I was ingesting a lot of information. However, I still think I could have gone a little faster. I did split my time with online lessons so there's that to consider. Despite taking my time, not all of the information will stick. Some of the details will be forgotten, but I have a good grasp of what's possible and can easily look things up. I didn't spend a lot of time experimenting on my own and mainly stuck with the book's lessons. Doing stuff on my own is going to be key to improving my technique and speed but I wanted to get a good foundation first. So where do I go from here? I still have a couple of online lessons to do. Then I already bought another introductory book so I'll be diving into that next. 

Day 86


Here are some examples of the use of physics in Maya. Now I'm back to my book and the train I've worked on before. Using particle effects similar to the previous fountain, I made some steam coming out of the engine.


Sunday, December 2, 2012

Day 85


Now I'm done with lighting and rendering. I'm sticking with the online lessons and the next topic is dynamics. These are the special effects like smoke and water and physics based stuff. Here I made a ring of points that constantly emit particles. Then I made a cone of force to push the particles up and then a donut shape to spread it up and out like a fountain. I edited the particles so they are more like streaks and then added in some color. 


Day 84


On the left is the starting objects with no shadows and default lighting. Next I throw in some realistic lighting. I put in some bouncing light which I mentioned a few posts back. You can see how the apple gives a little of a red tint on the banana.


Final render with occlusal shadows.


Another new lighting effect. It's that ripply effect on the bottom of swimming pools or when light goes through glass. On the left is the scene without any fanciness. Throw in some light on the right and then add in that new effect below. Also added the occlusal shadows cuz I like how it looks.


Day 83


With the last post, I'm done with another chapter of my book. Now I'm moving over to the online lessons and back to some basic lighting and rendering stuff. 


Day 82


Back to the wooden box. On the left you can see how the entire surface of box is reflective, even the line carvings. So I took the original photo of the box surfaces and kept just the black parts which correspond to the carvings. Using that as a guide, I can make it that those areas aren't reflective which you can see on the right.


Using the same technique, I can make those areas look indented like an actual carving. The results are above.


Now I have the final box and lamp and want to light the scene. Another method to produce light is to use an image as a guide. Here I'm given a spherical panorama of a living room to use as a light source. Any bright spots like from a window will produce light.


Then I added in some walls and a wooden table surface. The final render is below where I added the occlusal shadows like in my previous post. The box looks a little pixelated but I don't want to re-render it again to fix it.


Day 81


Next up is a lesson in ambient occlusion. The idea is that places where two surfaces meet tend to receive less light and be darker like where two couch cushions meet. Above is the starting scene which looks pretty good. However some shadows are missing because there are only a few lights lighting the scene. Instead of adding more lights and potentially complicating the scene, you can do a separate render for occlusal shadows which is independent of the lighting in the scene.


Here is the result of that rendering and you can see where shadows would be under general uniform lighting. Then I can use that and combine it with the first image to produce a more realistic look. I combined it using Photoshop so I'm not sure how it would work for an animation instead of a still image.