Now I'm using blend shape deformers for facial animation. I made a few copies of the original dog and tweaked the geometry in different ways. Here I made a smiling face, sad face, eyebrows up and eyebrows down. Then I sort of linked all these back to the original and each pose kind of becomes its own adjustable variable. So the original face would be 0, the eyebrows up face would be 1 so then a value of .5 would be something in between.
Now I have four facial attributes and I can put in different values for to make different facial expressions. Doing just simple combinations of the first two faces with the second two, I get a sort of evil, surprised, scared and not too pleased face.
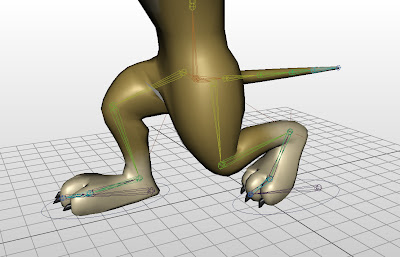
With that done, I moved onto refining the skeleton I made previously. This involved making IK chains. This is probably the third time I've talk about them so just to be brief, they're kind of a short cut that allows me to move the foot around and have the knees follow along automatically instead of having to rotate all the joints by hand. This is especially important for the legs because you want the feet to make contact with the ground so it's easier to sort of lead with the feet. I said I've done this a few times, but unfortunately, every time is different which makes it hard to completely grasp. This dog has the most complex set up I've done so far. I could understand what was going on as I was doing it, but I probably could not replicate it on my own.
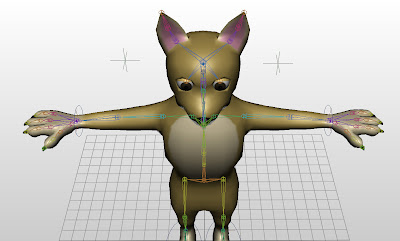
After the legs, I made IK chains for the arms which is a first. All the times before, I just animated the arms joint by joint because hands can go anywhere and I don't have to worry about making contact with the ground or producing the roll the foot does when we walk. But the book wanted them on the arms and I must do what the book says. The chains are much simpler than the leg ones. To balance the simplicity, I've added control points (the hovering crosses in the picture above) which each elbow will point to. With IK chains, Maya will guess how the elbow will bend and these points will give a little bit of control in case Maya doesn't guess correctly.
I added another control point which the eyes will follow. Then I made a new attribute to control blinking. Kinda of like the blend shapes for facial expressions, I set the eyes opened wide and then closed as my max and min values so they're now adjustable using just a number value.
Then lastly, I made one more new variable which is how smooth the model looks. I've worked with flipping between rough and smooth versions of my model but that was more of a preview. This attribute actually changes the model. You can see the rough vs smooth above. I wish they went over this first so all the above pictures could have looked better.


No comments:
Post a Comment